
Synexa Holiday Notice
Schedule a holiday notice
Set start and end dates using your store timezone and understand overlapping notices.
Updated
You can make a notice eligible immediately, run it for a set period, or prepare it for a future date. Times are entered in the store timezone shown in the editor, not the shopper's timezone.
Set the schedule
- Open a notice and find Schedule.
- Check the displayed timezone. Change it through Settings → IANA timezone if it is wrong before entering new dates.
- Enter both Start date and Start time for a scheduled beginning. Use 24-hour time. Leave both empty for immediate eligibility.
- Enter both End date and End time if the notice should expire. The end must be after the start. Leave both empty for no expiry.
- Set Publishing state to Published, check Enable this notice, and save.
- Check Notices or the dashboard's Upcoming notices and Selected notices sections.
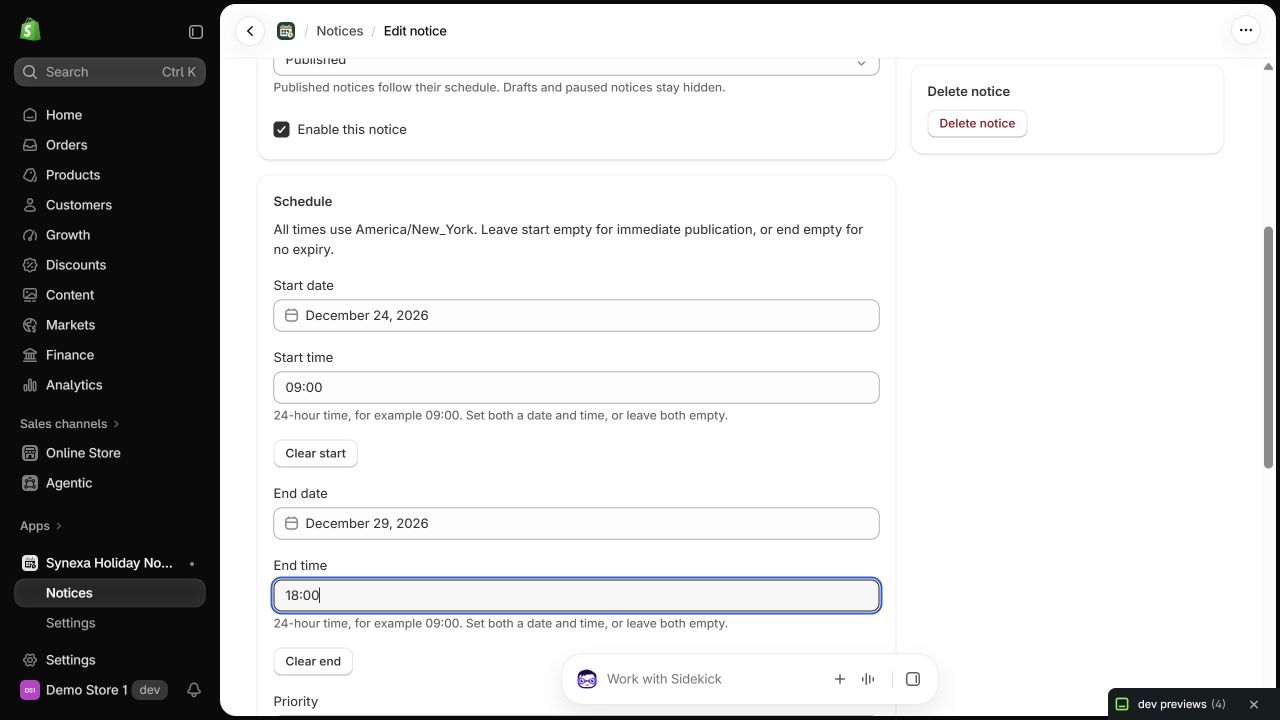
October 2026 interface example. The illustrated dates are demonstration values, not a recommended schedule.
How boundaries work
A notice becomes eligible at its start time and stops being eligible at its end time. If an end is midnight, that is the beginning of that date, not the end of that day. A future date does not display a draft: it must also be published and enabled.
Changing the timezone setting later changes how existing saved instants are displayed, without moving those instants. Recheck saved notices if your intended business timing changes. Ambiguous or nonexistent daylight-saving times may be rejected; select an unambiguous local time.
When schedules overlap
Higher Priority wins; equal priority favors the earlier-created notice. Free and Starter display one notice; Pro displays up to three. More eligible notices can exist than the storefront is allowed to display. Dismissing the selected notice does not automatically promote a lower-priority alternative.