
Synexa Holiday Notice
How to create your first holiday notice
Create a draft with a message, schedule, colors and priority, then publish when ready.
Updated
Start with a draft so you can review the message and timing before shoppers see it. You need the app installed and permission to manage it in Shopify admin.
Create a draft
- Open Synexa Holiday Notice and choose Create notice from the dashboard or Notices page.
- Enter an Internal title that helps your team recognize the notice. It is not the storefront message.
- Choose a Notice type: Holiday, Shipping delay, Temporary closure, Reopening, or General.
- Write the customer-facing Message in plain text. Keep it within the form's 500-character limit; HTML is not supported.
- Keep Publishing state set to Draft while preparing the notice. Check Enable this notice if you want it eligible when you later publish it.
- Review the Schedule, Priority, Background color and Text color. Starter and Pro can also use an optional link label and URL.
- Choose Create notice to save it.
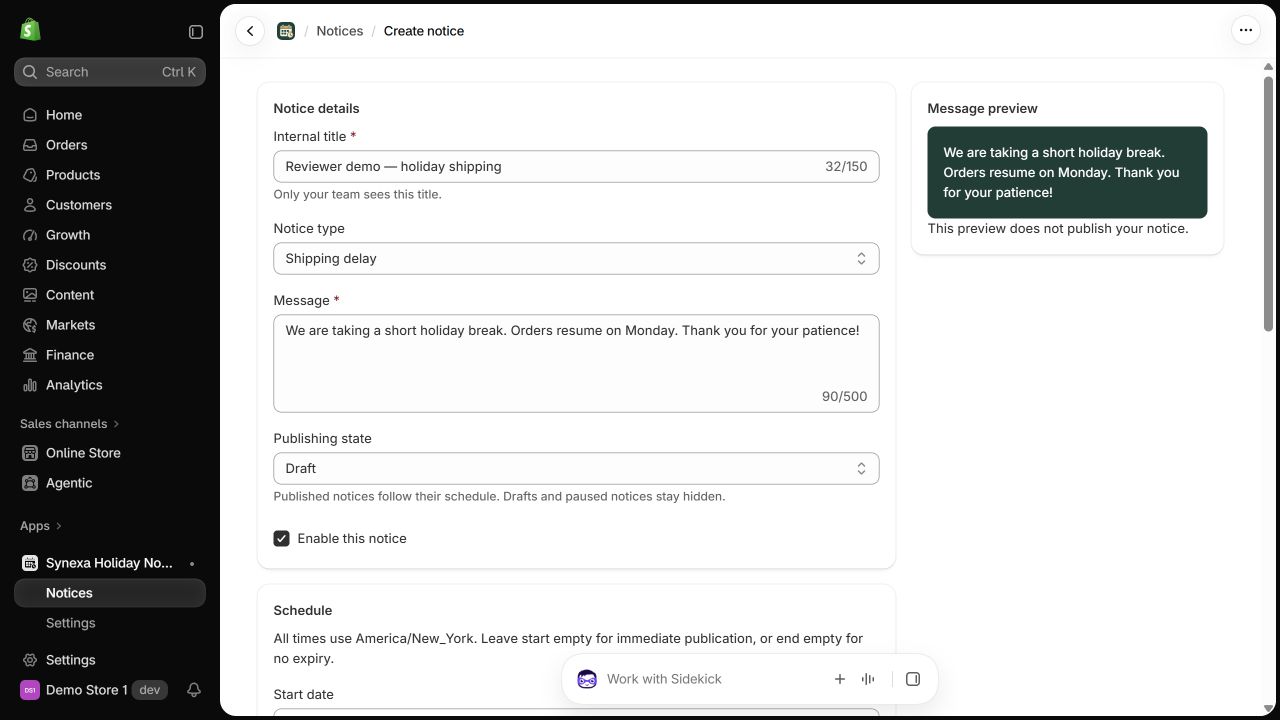
October 2026 interface example using demonstration content. The message preview does not publish the notice.
Check the result
Your notice should appear under Notices. Open it to edit, then choose Save changes. A draft remains hidden even if its enabled checkbox is selected.
When ready, set Publishing state to Published, confirm Enable this notice, and save. If the start time is in the future, it is scheduled rather than immediately active. Enable the theme app embed before checking the storefront.
If saving fails
Read the validation banner and check the message, colors and dates. If you reached your saved-notice limit, remove an unneeded notice or review Plans. Drafts, paused and expired notices also remain saved records.